What's in this article
Underinflated tyres increase rolling resistance and raise fuel consumption. That part is well known.
What is less well known is that many drivers who do check their tyre pressure are using the wrong figure, checking at the wrong time, or relying on equipment that may not be accurate.
This article sets out the correct procedure from start to finish, including the three most common mistakes that leave tyres at the wrong pressure while the driver believes they have set them correctly.
Time needed: 5 to 10 minutes for all four tyres. Equipment: a tyre pressure gauge, or a forecourt air machine with a built-in gauge. No mechanical knowledge required.
Key takeaways
- The correct tyre pressure for your car is on a sticker inside the driver’s door jamb, not on the tyre sidewall. The sidewall figure is the maximum the tyre can structurally hold, which is not the pressure you should run.
- Pressure must be checked on cold tyres, before driving, or after no more than one to two miles at low speed. Checking warm tyres gives a higher reading; adjusting to the recommended pressure from a warm reading leaves the tyre underinflated once it cools.
- The TPMS warning light triggers only when a tyre is already significantly underinflated, typically 25% below recommended pressure. It is a safety alert, not a pressure management system. Regular manual checks catch problems before the light comes on.
- Most manufacturers specify a higher pressure for full-load driving. Check your door jamb sticker for both the standard and laden figures and use the appropriate one before long or heavily loaded trips.
- Over-inflating beyond the recommended pressure does not improve fuel economy. The rolling resistance benefit is achieved at the correct pressure; over-inflation reduces grip and causes uneven centre-tread wear.
Why tyre pressure affects fuel economy
An underinflated tyre has a larger contact patch with the road and deforms more under load, both of which increase rolling resistance, the force the engine must overcome to keep the car moving. More rolling resistance means more fuel per mile. The effect is proportional to the degree of underinflation: a tyre significantly below the recommended pressure has meaningfully higher rolling resistance than one correctly inflated.
Underinflation consistently increases rolling resistance and reduces fuel economy. The exact effect varies by vehicle and by how far the tyre is below the recommended pressure, but the underlying principle is well established.
Underinflation also accelerates tyre wear, particularly on the outer edges of the tread, and reduces handling precision. In severe cases it increases the risk of tyre failure. Correct pressure is one of two straightforward fuel-saving levers most drivers can action immediately, the other is finding the cheapest petrol near you before your next fill.
Before you begin
Setup task 1: Find your car’s recommended tyre pressure
Open the driver’s door and look for a sticker on the door edge or B-pillar. On most cars, this lists the recommended pressures for the front and rear tyres separately. The sticker typically shows two settings: one for standard load and one for full load (four or five passengers with a full boot).
Note these figures down and keep them accessible, whether in your phone, in the glovebox, or as a photo. You will need them every time you check. If you cannot find the sticker, check the owner’s handbook under “tyre pressures” or search “[make] [model] [year] tyre pressure” online for the manufacturer’s official figures.
This is not the figure on the tyre sidewall. The number moulded into the tyre, typically marked “MAX. PRESS.” followed by a PSI or BAR figure, is the maximum cold inflation pressure the tyre’s structure can safely hold. It is set by the tyre manufacturer as a structural limit. Running a tyre at this figure would typically overinflate it for normal driving.
Setup task 2: Use a personal tyre pressure gauge
Forecourt air machines vary in accuracy. A personal gauge, available for £5–£15 from most motor factors and online retailers, lets you verify the reading independently. It also means you can check pressure at home without driving to a forecourt, which matters because you need cold tyres for an accurate reading. A digital gauge is more readable and typically more accurate than a dial type.
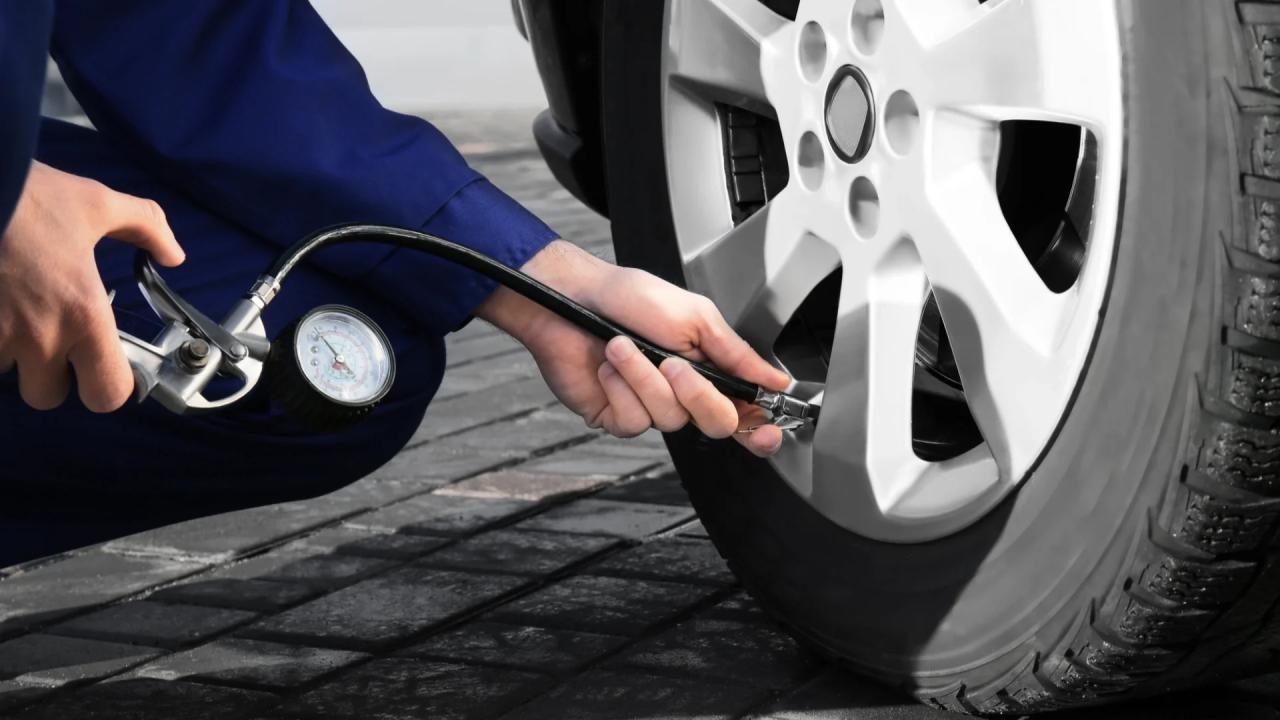
How to check tyre pressure properly
Step 1: Make sure the tyres are cold
The car should not have been driven in the last two to three hours, or should have been driven less than one to two miles at low speed. Driving heats the air inside the tyre, which expands and raises the gauge reading. Do not adjust the pressure from a warm reading.
Common error: checking immediately after a drive and finding the reading above the recommended figure, then releasing air to match. This leaves the tyre underinflated once it cools.
Step 2: Remove the valve cap
The valve stem is the short rubber or metal tube projecting from the wheel rim. Unscrew the small dust cap and put it in a pocket, not on the ground.
Step 3: Measure the current pressure
Press your gauge firmly onto the valve stem. If you hear a hiss, the seal is not complete, so reapply it with firmer pressure. The gauge reads in PSI or BAR (1 BAR = approximately 14.5 PSI; your door jamb sticker may show either). Compare the reading to your manufacturer’s recommended figure for that axle and load condition.
Step 4: Add air if the tyre is below the recommended pressure
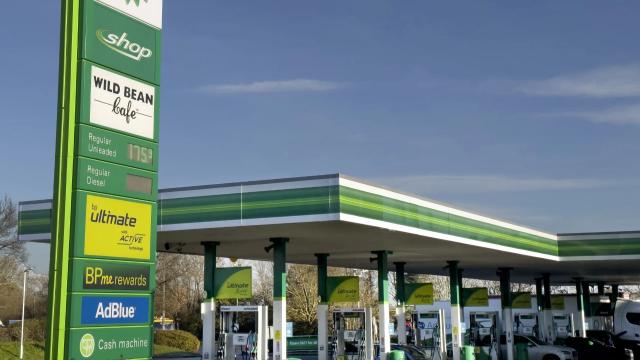
At a forecourt air machine: set the target pressure on the machine’s dial or display if it has one, attach the hose to the valve, and let the machine inflate to the target. If the machine has no auto-stop, inflate in short bursts and recheck with your personal gauge between bursts to avoid overshooting.
Common error: trusting the forecourt machine’s gauge reading without independent verification. If the machine reads significantly differently from your personal gauge, use your personal gauge as the reference.
Step 5: Release air if the tyre is above the recommended pressure
Most gauges have a release nib on the back end; a thin object such as a pen lid also works on the pin inside the valve. Release air in short bursts and recheck until the reading matches the recommended pressure.
Common error: releasing too much in one press and undershooting. Short bursts and frequent rechecking give better control.
Step 6: Recheck after adjustment
After adding or releasing air, take a final reading with your gauge to confirm the tyre is at the recommended pressure. Pressure adjustments can slightly shift the valve; a final check catches any discrepancy.
Step 7: Replace the valve cap
Hand-tight is sufficient. The cap keeps debris out of the valve and prevents slow leaks from a dirty valve seat. Repeat for all four tyres, using the correct figure for each axle, as front and rear pressures are often different.
How often you should check
Once a month is the standard recommendation from tyre manufacturers and motoring organisations including the RAC. Tyres naturally lose approximately 1–2 PSI per month under normal conditions. A monthly check catches gradual losses before they become significant.
Additional trigger checks: do these regardless of the monthly schedule:
Before any long trip (over 100 miles)
After a significant temperature drop, a cold snap of 5°C or more below recent conditions causes a measurable pressure drop
After a change of load, switch to the laden pressure before carrying four or five passengers with a full boot, and revert to standard after
If the TPMS warning light comes on, check all four tyres immediately
After any kerb strike or pothole impact that felt significant
What the TPMS warning light really means
The TPMS warning light, a horseshoe shape with an exclamation mark, means at least one tyre is significantly underinflated. The typical trigger threshold is 25% below the recommended pressure. A tyre with a recommended pressure of 35 PSI would trigger the light at approximately 26 PSI. That is substantial underinflation.
TPMS has been mandatory on new cars sold in the UK since November 2014. When the light comes on: check all four tyres with a gauge as soon as it is safe to do so. Identify which tyre is underinflated and inflate to the correct pressure. The light should extinguish once the tyre is correctly inflated; on some cars it requires a short drive to reset.
If the light comes on again shortly after inflation, the tyre has a slow puncture and needs inspection at a tyre fitter.
TPMS does not tell you which tyre is affected, how far below pressure it is, or whether the cause is a puncture or a temperature drop. It is a last-resort safety alert. Drivers who rely only on TPMS may spend long periods driving on underinflated tyres before the warning light appears.
Common myths about tyre pressure
“The pressure on the tyre sidewall is the correct pressure to inflate to”
The figure moulded into the tyre sidewall, typically marked “MAX. PRESS.”, is the maximum cold inflation pressure the tyre’s structure can safely withstand. It is set by the tyre manufacturer as a structural limit, not a driving recommendation. Inflating to this figure would typically overinflate the tyre for normal driving, reducing the contact patch, compromising wet grip, and causing accelerated centre-tread wear. The correct running pressure is the vehicle manufacturer’s figure, found on the door jamb sticker or in the owner’s handbook.
“Slightly over-inflating improves fuel economy”
The fuel economy benefit from correct inflation comes from reducing rolling resistance compared to an underinflated tyre. That benefit is fully achieved at the manufacturer’s recommended pressure. Inflating beyond the recommendation does not further reduce rolling resistance in a meaningful way; it reduces the contact patch, which lowers wet grip and causes uneven centre-tread wear. The recommended pressure is the correct operating target for normal driving, not a minimum that should automatically be exceeded.
“The TPMS light tells me my tyres are fine if it is not on”
TPMS warns at a threshold, typically 25% below recommended pressure. A tyre can be 15% underinflated, meaningfully affecting fuel economy and handling, with the light remaining off. Seasonal pressure drops in cold weather often stay below the TPMS threshold while still representing significant underinflation from the summer baseline. The light off means no tyre has crossed the warning threshold; it does not mean all tyres are correctly inflated.
Quick-reference checklist
One-off setup tasks:
- Find the door jamb sticker on your car and note the standard and laden pressures for front and rear axles
- Photograph the sticker or record the figures somewhere accessible
- Buy a personal tyre pressure gauge if you do not own one (£5–£15)
Monthly habit tasks:
- Check all four tyres on cold tyres (not after recent driving)
- Check before any trip over 100 miles
- Switch to laden pressure before carrying full loads; revert to standard after
- Check after any significant cold snap
- If TPMS light comes on: check all four tyres immediately with a gauge
At the forecourt air machine:
- Confirm tyres are cold before relying on the reading
- Set or note target pressure before attaching the hose
- Verify the machine’s reading against your personal gauge if there is a discrepancy
- Replace all four valve caps after inflating
Keep reading
What Is a Good Petrol Price in the UK?
A good petrol price is one that is competitive for your area and station type, not just low against a national headline average. A price that looks expensive in a competitive super...
Is Eco Mode Worth Using? What It Actually Changes and When It Helps
Eco mode does save fuel. The changes it makes are real, and in the right conditions they produce a genuine if modest improvement in economy. The catch is that what Eco mode changes...
Does Engine Size Determine Fuel Costs? The Variables That Actually Matter More
Engine size does affect fuel consumption, and larger engines often use more fuel on average. But it is one of the weaker predictors of real-world running costs. Vehicle weight, dri...
PetrolSavings Editorial
Editorial Team
Explore fuel savings tools
Use calculators and local price searches to plan smarter journeys.
Prices and station info are refreshed continuously. Look for freshness timestamps when comparing fuel deals.